About Me
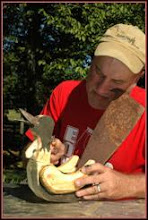
- Robbie Mueller
- I am a retired Kentucky teacher turned self-taught artist. Originally, I built and sold primitive farmhouse furniture like shelves, tables and plate racks. Soon I found myself creating accent pieces like chickens, crows, and weathervanes. My love of making functional furnishings had evolved into a passion for making “art.” While I had no formal training in art, friends insisted I was not just making stuff with junk, I was creating mixed media sculpture. I consider myself a contemporary folk artist. Carved wood, corrugated metal and coated electrical wire become a raven landing on a fence post—Raven’s Roost. Discarded metal roofing, a rusted steel rod, and hand carved cow (including udders) turned into Elsie’s Udder Side a whimsical weather vane. Night Bandit is a raccoon carved from pine with a refrigerator coil brush for a tail. Finishing my pieces with a “time worn” painting technique is a unifying characteristic of all of my work. Coming up with a catchy name for each piece is always a fun way to finish.
Showing posts with label paper mache'. Show all posts
Showing posts with label paper mache'. Show all posts
Monday, February 13, 2012
Getting Plastered???
One of the materials that I have been experimenting with is plaster embedded on gauze fabric. I was able to get several outdated boxes of this medium from the orthopaedic surgeon that my sister works for. I thought that it might be a nice complement to the paper mache' work I have been doing.
Thus far, I have mixed reviews about it's potential as a viable medium. The advantages of using this medium include: it hardens very quickly (usually sets within 4-5 minutes after being shaped), it becomes easily activated when placed into very warm water, it can easily be cut into usable pieces for smaller detail work, you can cover a relatively large surface area quickly, rolls are available in a variety of widths, and you can achieve various textures depending upon the way you manipulate the plaster.
The disadvantages include: it appears to be expensive (although, I have not done any in depth research), it takes multiple layers to "build-up" the thickness to assure structural integrity, it is messy, it gets your armature very wet (so you must consider if your materials will deteriorate if it absorbs too much), the wet roll sticks on itself and is difficult to wrap in close quarters, and the archival properties are unknown.
If you have used this medium or know someone who does, I would really appreciate your feedback and/or the necessary contact information to reach your resource. For now, I plan to find ways to put my supply to good use. I may provide future updates as I obtain more information, feedback, and/or experience with this product.

Thursday, February 9, 2012
Not Your Momma's Paper Mache'
I have had many of you request the recipe I use for making my paper clay. The recipe is not original to me. I found the mixture formulation on a website by artist Jonni Good. As has been true by so many in the artist community, she is very willing to share her knowledge.
Although you will not find this recipe to be an exact replica of Jonni's, it has been the mixture that has worked best for my purposes. I would encourage each of you to experiment with the materials and modify the recipe according to your needs. Jonni's site has other valuable resources and helpful links that I would encourage you to use if you are attempting the medium of paper mache' for the first time.
You will find that there is no single paper mache' technique that will work for each idea you have. You will likely need to familiarize yourself with a variety of methods, so as to be able to expand your range of work.
As a fellow artist friend shared with me today, "get your hands dirty and create" So, what are you waiting for, give it a try!!!
Paper Clay
1 - large double roll of toilet paper (makes about 3 cups)(I use the cheapest Walmart brand)
1 1/2 cups - Elmers GlueAll
2 cups - all purpose drywall compound (ready mixed) I generally use the one gallon size because I
don't want it drying out; you will likely need the 5 gal. buckets due to the larger batch sizes you
may eventually use
1 - cup all purpose flour
4 tablespoons of linseed oil (assists in preventing mold growth)
2 – small 1 - 2 gallon buckets or comparably sized containers
1 – 12” x 12” fiberglass window screen fabric (used as a filter and for squeezing out excess water)
1- dull butter knife (I use this both to mix my paper clay, as well as, to apply it)
1 – pair of non-latex gloves
How To Mix
1. Unroll one roll of toilet paper in a small 1-2 gallon bucket.
2. Cover the toilet paper with enough warm water to completely cover your pulp.
3. Use a butter knife to stir & breakdown your paper into a fine pulp.
4. Using a piece of fiberglass window screen fabric as a filter over another small bucket
(approximately 12" x 12"), pour about 1/3 of your paper pulp through the filter.
5. Squeeze-out most of the water from the pulp, by wrapping the screen cloth around the
pulp, and place the ball of pulp aside.
6. Repeat filtering the pulp through the screen cloth and squeezing it out with the remaining
2/3 of the wet pulp.
7. When all pulp has been filtered, place back into a bucket and break it up into the smallest
pieces as is possible.
8. Add the remaining ingredients on top of the pulp and begin mixing thoroughly; make sure
to mix all of the dry ingredients into the wet mixture(continue to break-up any clumps of
pulp)(I have found a dull butter knife the most effective tool to assist in mixing this
mixture)
9. If thoroughly mixed, the batch should look like a bucket full of lumpy oatmeal.
10. If not ready to use, cover and refrigerate.
Top Coat Slurry Mixture
I use this slurry mixture to help “smooth out” the surface of my pieces. Also, the slurry is helpful when adding-on detailed features or building-up or enhancing existing features. The slurry works great over areas where traditional strip paper mache' may need to be blended to hide strip overlap. The slurry is easily tinted with acrylic paints to achieve base colors when applying over a large area.
1 – part drywall compound
1- part Elmer's GlueAll
mix in a container with a tight fitting lid. Make sure to blend the two ingredients thoroughly to get any lumps out. An old mixer would work great to assist in making larger batches. This mixture also refrigerates well.
I have had many of you request the recipe I use for making my paper clay. The recipe is not original to me. I found the mixture formulation on a website by artist Jonni Good. As has been true by so many in the artist community, she is very willing to share her knowledge.
Although you will not find this recipe to be an exact replica of Jonni's, it has been the mixture that has worked best for my purposes. I would encourage each of you to experiment with the materials and modify the recipe according to your needs. Jonni's site has other valuable resources and helpful links that I would encourage you to use if you are attempting the medium of paper mache' for the first time.
You will find that there is no single paper mache' technique that will work for each idea you have. You will likely need to familiarize yourself with a variety of methods, so as to be able to expand your range of work.
As a fellow artist friend shared with me today, "get your hands dirty and create" So, what are you waiting for, give it a try!!!
Paper Clay
1 - large double roll of toilet paper (makes about 3 cups)(I use the cheapest Walmart brand)
1 1/2 cups - Elmers GlueAll
2 cups - all purpose drywall compound (ready mixed) I generally use the one gallon size because I
don't want it drying out; you will likely need the 5 gal. buckets due to the larger batch sizes you
may eventually use
1 - cup all purpose flour
4 tablespoons of linseed oil (assists in preventing mold growth)
2 – small 1 - 2 gallon buckets or comparably sized containers
1 – 12” x 12” fiberglass window screen fabric (used as a filter and for squeezing out excess water)
1- dull butter knife (I use this both to mix my paper clay, as well as, to apply it)
1 – pair of non-latex gloves
How To Mix
1. Unroll one roll of toilet paper in a small 1-2 gallon bucket.
2. Cover the toilet paper with enough warm water to completely cover your pulp.
3. Use a butter knife to stir & breakdown your paper into a fine pulp.
4. Using a piece of fiberglass window screen fabric as a filter over another small bucket
(approximately 12" x 12"), pour about 1/3 of your paper pulp through the filter.
5. Squeeze-out most of the water from the pulp, by wrapping the screen cloth around the
pulp, and place the ball of pulp aside.
6. Repeat filtering the pulp through the screen cloth and squeezing it out with the remaining
2/3 of the wet pulp.
7. When all pulp has been filtered, place back into a bucket and break it up into the smallest
pieces as is possible.
8. Add the remaining ingredients on top of the pulp and begin mixing thoroughly; make sure
to mix all of the dry ingredients into the wet mixture(continue to break-up any clumps of
pulp)(I have found a dull butter knife the most effective tool to assist in mixing this
mixture)
9. If thoroughly mixed, the batch should look like a bucket full of lumpy oatmeal.
10. If not ready to use, cover and refrigerate.
Top Coat Slurry Mixture
I use this slurry mixture to help “smooth out” the surface of my pieces. Also, the slurry is helpful when adding-on detailed features or building-up or enhancing existing features. The slurry works great over areas where traditional strip paper mache' may need to be blended to hide strip overlap. The slurry is easily tinted with acrylic paints to achieve base colors when applying over a large area.
1 – part drywall compound
1- part Elmer's GlueAll
mix in a container with a tight fitting lid. Make sure to blend the two ingredients thoroughly to get any lumps out. An old mixer would work great to assist in making larger batches. This mixture also refrigerates well.
Subscribe to:
Posts (Atom)